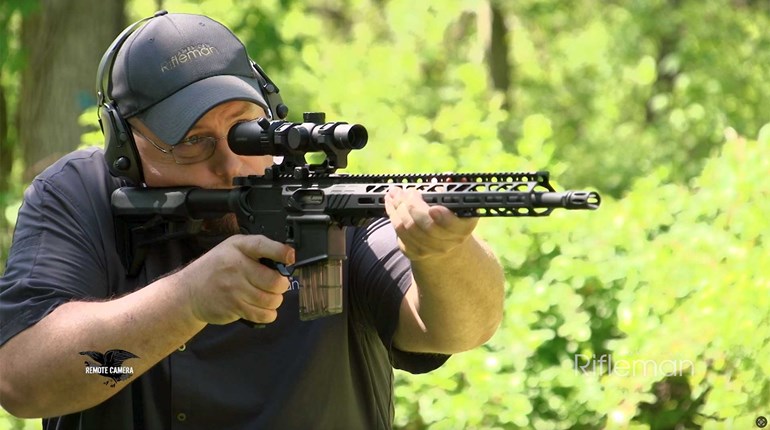
Shooters today shoot.
I know that’s redundant, but just a generation or so back, most gun owners didn’t shoot much. There were exceptions of course—the hardcore gun guys and handloaders, for example—but a lot of them just spent time on the bench punching holes at 100 yards or maybe smacked a woodchuck or two in the summer. It was a rare rifle owner who ever shot at a target at 500 yards, much less 1,000 yards. Benchrest or high-power-competition shooters might be the exception as they burned a lot of powder and stretched the distances, but they were only a fraction of a percent of gun owners. The number of shooters who shot recreationally at targets half a mile or farther off their muzzle was as rare as professional caterers for Bigfoot family reunions.
Today, there is a growing segment of the gun society that is focused on trigger pulling. While the rifle market has been driven by hunters for most of its existence, in recent years it is shooters buying long guns. They may or may not hunt, but they do shoot; often and a lot.
As a result, we probably have more shooters today who understand the capability of their rifles. They are in tune with their equipment, so when it starts acting up and accuracy goes on vacation, they know.
The question then becomes, how do I fix it? Well, I have a checklist. When a rifle suddenly goes rogue, here is what to do:
Clean the Bore
This is the single biggest issue I run into with rifles that have lost accuracy. Most people who bring their guns to my shop won’t believe me. They insist, often to the point of hostility, that they have cleaned the bore. They are not lying—they likely have cleaned it—they just never got it fully clean.
Lately, I am hearing “experts” claim that a rifle has to be dirty and fouled to shoot accurately. The prevailing theory is that the copper smears fill in the imperfections in the bore and make it more like a hand-lapped barrel. That is wrong on so many levels.
I have tested hundreds—perhaps even thousands—of rifles over my 40-year career as a gunwriter and have shot countless groups with those rifles. There is one simple truth I have learned: Clean barrels shoot much better than fouled barrels.

You must remove all the copper fouling. That means using the proper solvents and spending as much time doing so as is needed to get it all out. I have experimented with a lot of different approaches, but nothing I have found works better than an ammonia-based solvent. Right now, Montana Extreme Copper Killer is the best I have tried. When you open the bottle, the ammonia will make your eyes water, your sinuses seize up and your guts curl into a ball. That’s why it works.
Keep cleaning until you can wet the bore with solvent, wait a timed 5 minutes and then run a patch through and have it emerge out of the muzzle free from blue stains. How long will that take? Nobody knows. It might take five patches or it might take 500. About 70 percent of the time, this alone will correct a misbehaving rifle.
Scope
Another common problem is a bad scope rather than a bad rifle. The best way to check this is to replace the scope with one known to be good. If you don’t have one lying around, take one off another rifle or off your shooting buddy’s rifle. You only need it long enough to verify if the problem is corrected or not. You will need to re-zero the scope after you put it back on the loaner rifle, but so what? It’s just more shooting and who hates doing that?

Check the Screws
Oftentimes, problems with optics are actually problems with the scope-mounting system rather than the scope itself. To overcome those obstacles (short of buying a new, better set of rings and bases), make sure nothing is loose. Tighten the ring screws on the scope rings. Tighten the base screws, even if you have to pull the scope to access them.
In fact, while you are doing that, pull the screws out one at a time and put a drop of Loctite #242 on the threads of each screw. Then replace the screw and torque to the proper tightness.
Torque wrenches—like the Brownells Magna-Tip Adjustable Torque Wrench—are inexpensive and are a valuable tool for any serious shooter. If you don’t have one, you should. But if you are stubborn and cheap, have a gunsmith torque all the screws for you.
Here are a few basic torque specs: Tighten ring and base screws that are 6-48 to 20 inch-pounds. If they are in aluminum, 15 inch-pounds. The larger 8-40 screws can be tightened to 30 inch-pounds. Windage screws on the back ring of some scope mounts should be tightened to 45 inch-pounds.

Check the other parts of the rifle that can loosen. Pull the stock or chassis. Look for cracks, odd wear patterns or anything else out of place. Look under a strong light, as sometimes such things are hard to see. I recently had a rifle acting up and was having a tough time taming it. I finally noticed an odd-looking spot in the bedding. I took it outside in the sunlight and when I flexed the stock I could see a small crack open up. There was a much larger crack hidden underneath that was causing my problem. Once I fixed that, the gun started shooting like it should.
Tighten the action screws to the correct torque, again using a torque wrench. Action screws with a wood, fiberglass or synthetic stock should be 40 inch-pounds. If the stock has metal pillars, aluminum bedding block or in a metal chassis, go to 65 inch-pounds.

Bedding
You already did a visual check of the bedding. If the barrel is freefloated, confirm it has adequate clearance and is not contacting the stock. The old standby is to wrap a dollar bill around the barrel with the ends pointing up. Pull up on the ends and slide the dollar down the barrel to make sure it clears. If the stock is hitting the barrel, you must correct the problem.
This is much less of a problem on a modern sporting rifle or a precision rifle. But, you still should check to make sure that the fore-end is not loose and that nothing is touching the barrel. It’s not uncommon to mount a new sling attachment or piece of rail and have the screws contacting the barrel.
I once had a screw for a sling mount pushing hard on the barrel of my competition AR-15. A buddy installed it and I didn’t check his work. I zeroed with the screw applying pressure. During the course of the next match, the screw came loose and the rifle started shooting a foot to the left. It about drove me nuts before I figured it out. Rule out nothing, expect the bizarre to enter the picture. That way you are rarely surprised.
On a freefloat system, nothing should be touching the barrel. Use a flashlight to make a visual check inside the handguard tube.
Crown
Damage or wear to the rifle crown can have a dramatic effect on accuracy. What damages a crown? Abuse, like putting the gun muzzle down in the truck or cleaning-rod wear from cleaning from the muzzle without a rod guide. I don’t know for sure, but I suspect that shooting a lot can lead to minor flame cutting. The crown has a lot of enemies. Sometimes it’s just the gremlins. They hate rifle crowns. Just ask anybody.
There are lots of old tricks of the trade to locate damage, like rubbing a Q-Tip on the crown to see if anything grabs the fibers. Why bother? If a gun is acting up and you are playing detective trying to track down the problem, re-crown the muzzle. If it shoots like it should, problem solved. If not, a new crown is never a bad thing.

You can take it to a gunsmith and pay to have the crown recut. Or, just do it yourself. I have a lathe and I have all the fancy and expensive crown-cutting tools. But, when a gun is acting up I use a simple, inexpensive, brass lap from Brownells with some 600-grit lapping compound and a cordless drill. Lap until the ring is fully to the bottom of each groove and fully to the top of each land.
If the rifle starts shooting again, problem solved. This is a great diagnostic tool. If you don’t like the idea of a lapped crown, you can always have it recut on a lathe later, although I don’t see the point. Many of the top gunsmiths, some of those with a reputation for building very accurate rifles, finish their lathe-cut crowns by lapping.
Broken Brake
If your rifle has a muzzle device, a brake or a flash hider, there can be problems lurking about. Depending on the design, it’s not all that uncommon for the carbon to build up on the muzzle and inside the device enough to have an effect on the bullet. I have seen so much carbon packed into an AR-15 flash hider that it was migrating into the bullet’s path. The bullet exited the muzzle, only to scrape against the carbon before starting on to its final destination. Accuracy, of course, was horrible.

Pull the device and clean it and the muzzle. While you are at it, you might want to re-crown. Like I said, doing so is never a mistake.
Worn or poorly cut threads can allow a brake to sag over time. If the bullet is impacting the brake, even a little bit, it will trash accuracy.
Some years back I had a rifle go sour and it was giving me fits. It was a beast of a cartridge, the .30-378 Wby. Mag., which burned a lot of powder and generated a lot of heat. The first two or three shots were fine, but after that all bets were off.
The most-common reason for this issue is the barrel. Those that are straightened, but not properly stress relieved after, will often revert back to their original form as they heat up and cause stringing on the target. But that usually means the groups open up as the barrel heats. This one would shoot two or three into one hole and then miss the target with the rest.
I finally noticed a little copper wash on the inside of the muzzle brake. My theory is the bullet was missing contact until after a few shots heated the metal on the brake. The expansion was just enough to cause light contact with the exiting bullet. A new brake fixed the problem. Today, I would probably just put the brake in my lathe and open the exit hole an extra .010-inch. Some problems have multiple solutions.
To check if any of this is happening, take the muzzle device off and see if the gun shoots better. This will likely provide a clue.
New Barrel
Usually, if the culprit is barrel erosion, the accuracy deterioration is gradual, not sudden, but nothing is cut in stone when it comes to rifles. If nothing else is working, find a borescope and look at the bore. Lyman sells a good borescope for not much money and again every serious shooter should have one. It helps with cleaning issues as well.
If the first inch or two in front of the chamber looks like a burned-out, dried-up, cracked-earth wasteland with no definable rifling, you might have shot that one out.

Sometimes a gunsmith can set the barrel back a thread, cut the chamber deeper and get some more life out of the barrel. Usually, though, it’s just time for a new one. They install them all the time.
As this new generation of shooters has discovered, rifles are made to be shot. The barrel is a consumable. If yours is consumed, pay a gunsmith to install a new one. Pick a high-end barrel from one of the better makers, and it’s likely your rifle will be more accurate than it ever was before.
Desperate Times
Maybe your rifle is just cursed, so take it to a priest for an exorcism. Or, I suppose, last ditch, you could trade it for a new rifle.


