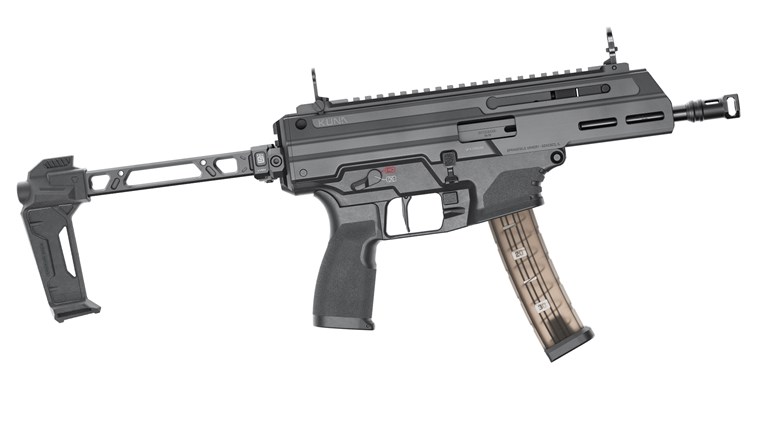
Pistol-caliber carbines (PCC) have become increasingly popular in recent years. One reason may be their inclusion in major action-shooting competitions. Another, however, is the fact they can be quite effective home-defense tools, too.
A compact carbine is not only easier to hit with than a handgun, but has significantly less recoil to recover from when repeat hits are needed. That inherent shooting advantage can be important if family members have to operate the gun in an emergency.
There’s also a power advantage. In the 9 mm, for example, a 16-inch barrel will gain around 150 to 200 fps velocity over the same load from a handgun. That elevates a 124-grain 9 mm into .357 Mag. territory, with far less muzzle blast and recoil. Some carbines also hold more rounds; others use pistol magazines.
While the PCC has advantages, there is one major disadvantage as it comes from the factory: It lacks the handgun’s maneuverability in tight quarters. That was a drawback in action-shooting competition. Those shooters are routinely required to engage close-range targets from behind cramped barricades, small ports, and other obstructed positions. Handgunners could shift hands and “point and shoot.” But getting a carbine mounted to the shoulder and focusing through the sights takes score-killing time; assuming it is even possible without drawing fault-line penalties. I talked to a USPSA Grand Master regarding that. He was convinced that PCCs would never become the dominant gun in USPSA because of those maneuverability issues.
Two years later he was winning matches with a PCC. And carbines now consistently populate the upper levels of the leader boards. What happened?
They added a laser to their PCCs.
Strong- to Weak-Side Shift


The Laser Advantage
Lasers changed their game. Mounting the carbine, achieving a cheek weld, and focusing through the sights was no longer required for accurate close-range hits. They could just push the muzzle toward the target, follow the laser dot, and pull the trigger.
While some may (arguably) opine that shooting games bear little relation to actual self-defense, maneuvering a carbine in those situations is not dissimilar to what a homeowner may face when investigating the proverbial “bump in the night.” Peeking around corners, checking hallways and rooms, while trying to expose as little body as possible to potential threats, is very difficult with any long gun mounted to the shoulder and the eyes focused through the sights.
The laser removes that need. That’s important because a mounted gun and through-the-sight focus create tunnel vision that can be fatal. The “heads-up” position allowed by the laser affords
maximum peripheral vision, which can quickly locate movement and threats.
Selecting a Laser Sight
There are a number of laser sights that can mount quickly to the Picatinny or Weaver rail that virtually all PCCs have. By law, civilian models are limited to Class 3R with a maximum 5mW peak output. They are available in red or green. The power levels are the same, but since green is a more-visible color to the human eye, it has a longer viewing distance.
On an outdoor range under bright sunlight my green Crimson Trace CMR-204 Rail Master is visible on a buff-colored target to about 12 to 14 yards. My two red lasers wash out and become invisible at half that distance. That’s the reason competitive shooters opt for green lasers. Most matches are held outdoors.
For home defense, laser color becomes moot. Remove direct overhead sunlight and red or green lasers are highly visible under indoor-lighting conditions. The longest straight line-of-sight distance in my home is 16 yards. Even at noon, with the drapes open and all incandescent lights on, both red and green lasers are brighter at that distance than at even 3 yards outdoors, and are faster to acquire than iron or reflex sights.
Lasers allow rapid target hits. But at “zero dark thirty” target identification becomes important, especially if there are other family members in the home. Two hands are advantageous on a long gun. That can rule out the hand-held flashlight that functions well with a handgun.
Some PCCs allow multiple accessory-mounting positions, and a light could be installed along with the laser. A simpler solution is a compact light/laser unit that operates from one set of controls.
The CTC unit on my Ruger carbine has a 100-lumen white light that taps on and off with the laser. That’s plenty of light to identify friend from foe. Other units that have earned good performance marks are the Streamlight TLR-4 G Gun Light (green laser/115-lumen light) and the SureFire XC2 (red laser/300-lumen light). Additional options are available from a number of makers. A light/laser combo adds little weight to the gun, but provides quick target identification as well as target acquisition.

Zeroing the Laser
The optimal location to mount the laser is on a forward portion of the fore-end where the support hand can easily activate it. Whether it’s directly below the barrel, or to one side, there will be a degree of offset with the bore axis, but that’s insignificant at typical home-defense distances.
Zeroing the laser is easy. First, zero the iron or reflex sights. Twenty-five to 50 yards is appropriate for a PCC. There is little point in trying to zero the laser at that time because it will not be visible at those distances outdoors.
Instead, bring the gun into the house (double-checking to make certain it is unloaded) and find the longest line-of-sight distance available. Choose an aiming point on a wall and secure the gun in a solid rest with the sights locked onto the target. Use the appropriate Allen wrench to move the laser dot to intersect with the sights. You should be able to see the dot move. If the sights are on target and the laser is intersecting with the sights, the laser will be on target.
That will be adequate for home defense. If a longer sight distance is required, wait until dusk/dark. Step outside, lock the gun/sights on a specific object at a greater distance (25 yards or more) and move the laser dot to intersect with the sights.
The effective use of a PCC in close quarters involves more than just basic marksmanship skill. The ability to maneuver the carbine is critical. Here are two gun-handling skills worth learning.
Moving to Carbine Retention Position

Strong- to Weak-Side Shift
The biggest advantage to a handgun in close quarters is that it can quickly be shifted to the weak hand to peek around awkward corners. So can the PCC.
A normal firing grip (whether a right- or left-handed operator) will have the weak hand on the forearm and the strong hand on the pistol grip/trigger. To make the shift: (1) Drop the buttstock slightly off the shoulder, (2) Slide the support/weak hand back until the heel of the hand contacts the magazine well,
then close the hand on the forearm to control the gun at that mid-point, (3) The strong hand then moves forward to grab the forearm to take control of the gun, allowing the weak hand to slide back and assume trigger control. The gun can then be
re-mounted if desired.
Those with limited upper-body strength may find that pushing the buttpad to their chest before the strong hand leaves the grip will help keep the gun level and the muzzle from rising.
The ability to quickly shift the PCC can be critical when one has to pie around offside doorways and hallways.
Retention Position
A two-hand firing grip is optimal with handgun or carbine. But, two hands may not always be available if doors have to be opened or objects pushed out of the way. A handgun can be dropped into a strong-hand retention position to free the support hand, and so can the PCC.
To assume a carbine-retention position, drop the butt from the shoulder, leave the strong hand on the pistol/grip trigger, pull the buttstock under the armpit and lock it into place by bending the strong arm down over it, and remove the support hand from the forearm. The gun is now controlled with the strong hand, freeing the support hand.
Most carbines will weigh between 5.5 and 7 pounds. With the buttstock wedged, it’s easy to keep the barrel level. It will now move with the eyes and the hips, and allow the same accurate close-range shot achieved with the handgun-retention position.
Both of these drills can be practiced in the home with an unloaded gun.
Basic Shooting Drills
Long guns are easier to shoot than handguns, but they still require practice. These drills will help meld shooter and PCC into one effective unit.
Low-Ready Drill: Set up one realistic silhouette-type target. Bring the PCC to a low-ready position. Using the iron or reflex sights, snap the gun up to the target and double-tap it—one sight picture, two rapid trigger presses. With pistol calibers two hits are definitely better than one. Given the weight of the gun and the light recoil, “one sight picture; two rapid trigger presses” will put two hits very close together, even at 20 yards. Shoot this drill at 5, 10, 15 and 20 yards.
When comfortable with this basic drill, add the strong- to weak-hand shift. Double-tap the target from the strong side, then immediately shift the gun and double-tap it from the weak side.
Transition Drill: Criminals don’t always travel alone, and more than one may have to be addressed in a home invasion. For this drill, set up three targets spaced about 2 feet apart. Face the center target from the low ready, double-tap each one and swing smoothly across them. Shoot this drill at the same ranges as the Low-Ready Drill.
When comfortable, add the hand shift: double-tap each target, immediately make the shift and double-tap each again from the weak side.
Include The Laser
The basic drills use the iron or reflex sights and stress a proper cheek weld and sight picture. It’s a “get acquainted with basic long-gun marksmanship” process. That may not be the best choice for investigating a “bump in the night.”
Both of the above drills should also be shot with the laser. Depending upon the model, and the ambient light conditions, the firing distance may have to be moved to inside
of 10 yards.
Use the same procedures, including the hand shift. Start from the low ready, but forget the iron or reflex sights. Use an upright head position (looking over the sights and not through them) to maintain maximum peripheral vision. Focus on the laser dot and guide it to the targets.
Combine a laser/light sight with the inherent shooting advantage of the carbine, add focused practice and your PCC will be optimized for home defense.

Beretta Cx4 Storm
A carbine version of Beretta’s popular Storm pistols, the Cx4 Storm can use Px4, 90-series and 8000-series magazines using optional adaptors. Case ejection can be set up for righties or southpaws. (800) 237-3882; beretta.com

CZ Scorpion EVO 3 S1 Carbine
CZ-USA’s Scorpion is available with the option of a two-port compensator or faux suppressor. It comes with a folding, adjustable stock and the fore-end has M-Lok attachment points. (800) 955-4486; cz-usa.com

CMMG Guard
Available in both 9 mm and .45 ACP, the Guard is an AR-style carbine that employs a radial-delay, blowback action and uses Glock magazines. Moreover, the barrel is threaded to accept suppressors and other muzzle devices. (660) 248-2293; cmmginc.com

Kel-Tec Sub-2000
Lightweight and incorporating an adjustable and folding stock, the Sub-2000 is well suited for backpacking or compact storage. Different versions can accept a wide array of magazines for popular pistols. (321) 631-0068; keltecweapons.com

SIG Sauer MPX Carbine
Switch between 9 mm loads without adjustment to the gas valve with the MPX. The modular carbine fires from a fully closed and rotated bolt, assuring safety, strength and accuracy. (603) 610-3000; sigsauer.com

Zenith Z-5 Rifle
Featuring a roller-delayed blowback action, the Z-5 is a licensed semi-automatic copy of the legendary Heckler & Koch MP5, complete with the fully adjustable rear drum sight plus a rail for optics (434) 202-7790; zenithfirearms.com


