By their very nature, fights are dynamic events. Movement includes changes in location, elevation and angles as participants try for an offensive or defensive advantage. Watch a Floyd Mayweather fight. You will see an incredibly skilled boxer who is a master at changing positions and angles, leaving his opponents unable to strike him and from which he is able to deliver serious punches. And while it’s unlikely that the average citizen will have to defend himself against someone with Floyd Mayweather’s skill set, it would be foolish to assume that any assailant we might encounter would remain as motionless as the two-dimensional paper targets most of us use for practice on a square range.
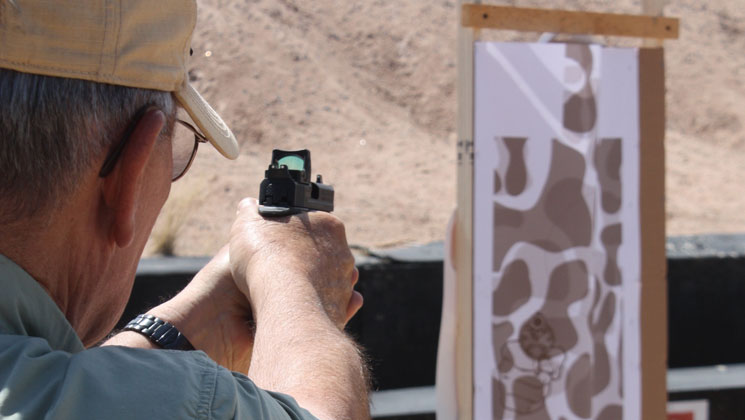
I’m not knocking the use of paper targets. They hone our basic combat-shooting skills at a very economical price, and when the target is a human silhouette holding a weapon, the practice session also serves as a basic Anatomy 101 class for gunfighting. Center-mass shots high in the chest or head shots are the student’s desired objective, because shots so placed are more likely to quickly stop unacceptable behavior. But what if the bad guy turns right or left, or drops into a crouch? Now you’re seeing body and head angles you haven’t seen in practice. And as your trainer explained, the middle of a gunfight is neither a good time for surprises, nor the place to be trying something new. Fortunately, there are a couple easy ways to add the odd-angle shot to your training routine.
For the 1997 “Handgun Digest,” I wrote an article on a defensive handgun-training class offered by Louis Awerbuck’s Yavapai Firearms Academy.
The late Awerbuck had come to America from South Africa and originally been a range master at Gunsite before starting his own school. As you might expect, many of the things he showed us are still staples in Gunsite’s training curriculum. What was unique (at least as far as I knew) was his technique for putting contour-type bulges in the paper targets that made them change shape as you moved around them or as you turned the target stands to various angles. He stapled the edge of a standard, “armed” paper target to one edge of the target stand, pushed the other edge of the target in toward the center until he had the desired contour (or depth) of the paper bad guy, then stapled the other side of the target to the cardboard right at the edge of the contour. Voila! Your villain was no longer a two-dimensional threat but possessed a chest that you had to hit from an angle other than head on. If you have a large enough berm behind the target, you can walk from either left to right or right to left, engaging a slightly different threat with each step. If you’re shooting in a bowl surrounded by an adequate berm, you can literally walk 180 degrees around the front of your target creating a wide variety of engagement angles. Not totally realistic, but certainly a worthwhile training aid that will give you a taste of what the future might throw at you.
I saw a movie a while back where a group of surfers made a living robbing banks. To conceal their faces, they wore pre-shaped plastic masks, in this case made to look like former U.S. presidents. Now imagine a deliberate “bad guy” pre-shaped mask that extends from the top of the head to the abdominal area and from shoulder to shoulder. Also, he’s holding a pistol directly in front of his chest. The front of the face and chest extend about 4 to 5 inches forward, creating a true three-dimensional and realistic-looking threat. For that added touch of reality, no matter where you stand in front of the target, the pistol appears to be pointing directly at you.
There are a number of good things about this target. Taken in no particular order of priority, having the gun at chest level forces the student to drop his firearm from the firing level to some form of low or high guard so he or she can assess the threat, i.e. verify that the target is armed. Lo and behold, he’s not only armed, but it appears he’s pointing his gun right at you. Deal with it, Grasshopper.
If you’re engaging at an angle, a shot aimed at the middle of his chest (which is where you were taught to aim in training classes and where the bad guy’s gun is located) is quite likely to skim the surface of his chest rather than penetrate the body cavity, thus failing to end the threat. You’ll have to aim slightly right or left of center chest (depending on which way he’s facing) to reach the vitals to inflict sufficient fight-stopping damage. No need to overthink it. Try to place your shot midway between the edges of the visible torso and in the upper part of the chest. It’s exactly what you learned on the 2-D targets: split the horizontal dimension in half and you’ll be in the sweet spot. What makes this more difficult is that there is no symmetry to the angled 3-D target. Put the front sight on the torso and shoot until the threat is down.
Head shots on a 3-D target are even more interesting. Normally when we look at a person, particularly someone who might pose a threat, we check the hands for a weapon, then concentrate on the eyes, and if necessary, shoot. We tend to point a pistol where we’re looking, in this case the eyes. A frontal shot, hitting an eye or the nose puts the bullet on a direct path to the brain, which will usually end a fight immediately. From the front, the eyes and nose are pretty much centered in the face, so there is some facial symmetry that makes things a bit easier. From a side angle, you can only see one eye, and it is located about an inch from the edge of the face. Missing the eye slightly toward the front of the face means a total miss, and you’ve done absolutely nothing to end the bad guy’s threatening behavior. It’s a difficult shot, particularly if you’ve never practiced this scenario and tend to focus your attention on the eye(s).
What’s helpful is that the side of most human heads presents a somewhat bigger area than the face. Once you’ve determined that the bad guy has a gun, simply raise your pistol from low guard to eye level and center your front sight horizontally on that portion of the head you can see. If your bullet impacts anywhere from the visible (near side) eye to the back of the ear, you’ve made a perfect shot. Reacquire your sight picture and be prepared to shoot again.
With most paper or plastic targets there is a lack of instant feedback on results. Steel poppers fall, but they’ll drop almost regardless of where they are hit. A dropped target is a good signal to a shooter telling him that the threat is over. On paper targets “threat over” is arbitrarily determined by the range master or pre-determined by designating number of shots to be fired. But while an edge hit on a steel plate drops the target, it’s not the quality of hit that will likely end a fight, and the student can become overly infatuated with the importance of speed over accuracy. The 3-D plastic targets have centered holes through the top portion of the anatomy and the head that allow the target to be mounted on a single stick or pole. If you place an inflated balloon behind the eyes (and/or chest cavity) but in front of the pole, the target can be made to stay at a desired elevation on the pole until the balloon(s) are broken by a well-placed shot(s). At this point the target slides to the ground instantly signifying the fight is over. The student can’t see the balloon behind the surface of the target. He can only see the front of the bad guy and must aim his shots where he thinks they will be most effective and keep shooting until he breaks the balloon and the threat goes down. Cool concept.
I’ve not yet used any of these targets, having just seen them during a recent trip to Gunsite Academy. Chief Operating Officer Ken Campbell plans to incorporate the new targets (from ID Target Systems) into the advanced defensive-pistol classes before the end of this year.
“Students need to quit thinking [two] dimensionally,” said Campbell. “We expect the 3-D targets will accelerate that process.” The new targets are more expensive than paper, but they are expected to survive many shots. Simply cover them with a piece of tape to differentiate old from new hits. There are also replacement face patches, and chest patches can swap a gun for a knife or a cell phone. In the fun house, a student must distinguish between threat or innocent bystander. It makes for both exciting and productive training.
 Changing Of The Guard
Jay Grazio
What if you want to practice shooting at angled targets, but your range won’t allow it? Or, perhaps you can’t get out to the range this week, but want to give it a try while it’s still fresh in your mind? LaserLyte has you covered.
The company makes a number of training targets that react to input from a laser device as well as chamber inserts, cartridge-specific inserts and dedicated laser-only pistols. The newest training aid is the Color Guard Training Target, which cycles through four colors—red, yellow, blue and green—with points added for hits on blue and green and points subtracted for hits on yellow and red.
The Color Guard can be used with a series of beeps to indicate good and bad hits or on silent mode to keep from annoying those around you. It can be placed at any angle less than 180 degrees and still register hits.
MSRP: $153.95; (928) 649-3201, laserlyte.com


