It's clear to anybody paying attention that terrorist attacks are on the rise in the United States. While the government and news media try to downplay the terrorist connection, many of the recent shootings and other events are clearly acts of terrorism.
A captured al Qaida training manual provides insight into the plans and strategies for terrorism. The plan takes several routes to the organization's insidious goals, including social disruption, infiltration, obfuscation, propaganda and other means.
The use of terrorist attacks has two basic approaches: One is big-bang attacks, like that of Sept. 11, 2001. But, the other approach is called "Death by a Thousand Cuts." This approach is a series of smaller, seemingly random attacks meant to change our way of life and create chaos in our society.
Examples of this are the Fort Hood shooting, the Beltway snipers, the Times Square would-be bomber and others. There is little doubt terrorism is on the rise in America and we have two choices: ignore it and hope it will not affect us directly, or prepare with the knowledge it could knock on our doors. It's unlikely we would suffer an attack where I live, but that's probably what a lot of victims have thought.
I am not dumb enough to think I can rely on the government to save me or my family, so I wanted to be better prepared for this eventuality. SIG Sauer Academy offers a wide range of shooting and self-defense classes from entry level though advanced techniques, and one that caught my eye was "Civilian Response to Terrorist Threats."

This class was developed and taught by Todd Rassa, a law enforcement officer with expertise in firearms and counterterrorism. He was assisted by Mike Akehurst, a law enforcement officer and a hand-to-hand fighting instructor at SIG Sauer Academy. They made a very good team.
The most important thing to remember about any attack is the best way to survive it is to get out and leave the area. Rassa stressed this strongly. The goal is to survive, and the best way to survive is to be someplace else.
However, when that is not an option, or when the way out is blocked, you will be forced to deal with the threat. The assumption is a terrorist attack will happen in a public place and when you are not expecting it, so the course focuses on how to fight with your concealed-carry gun.
Rassa designed the course around actual terrorist attacks. The first part dealt with an infamous event—the Beslan School attack where Chechen jihadists took more than 1,100 people hostage in the southern Russian town.

There is evidence in captured documents that this type of terrorist act, capturing schools or other public places, may be part of their plan in America. During the prolonged Beslan siege, more than 300 people were killed. If you are reading this magazine, chances are you would have been one of the first to die.
According to available information, early during the tragedy the terrorists searched all the men for weapons. If they found one, they shot the bearer. Then, they rounded up any man thought to be a threat; that is, anybody big, strong or with an air of confidence about them and killed them, too. The bottom line is if you are in this situation and you have a carry gun, they will look for it and when they find it, they will kill you. You can choose to submit and hope their humanity will spare you. Or you can fight.
The idea here is to first deal with the immediate threat—that is the bad guy who is searching you—as the first step to escaping to safety. More than 50 people were reported to have escaped during the initial stages of the Belsan attack, so it's a certainly possible.
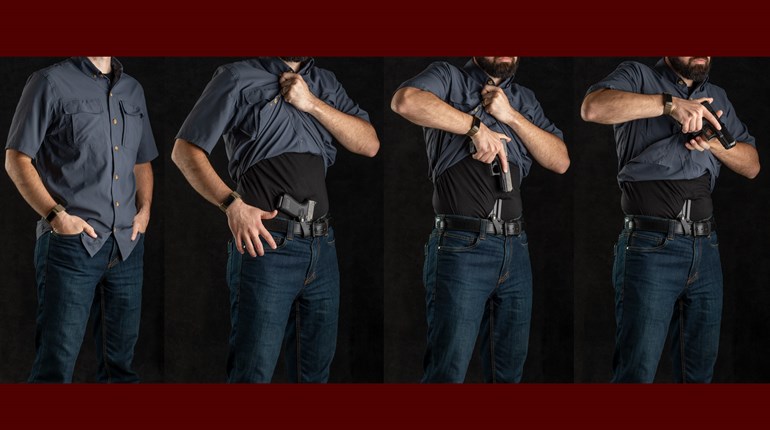
In all the drills, we used a concealed-carry holster and concealment garments. Rassa does not use a timer for any of these drills. That's because the focus should be on executing the moves perfectly—every time—not on how fast you can do it. If you are focusing on speed, your mind is in the wrong place. Speed comes with practice.
This is something with which I struggled due to my competitive-shooting background. I was trying too hard for speed. In some drills, I found that could get me killed. Competition neglects that bad guys shoot back, and some might be just as fast or faster than you.
Extreme-Close-Quarter Battle Techniques
The class started with several techniques for shooting-hand position in a variety of ultra-close-quarters drills. We practiced each of them and explored the reasons for the variations.
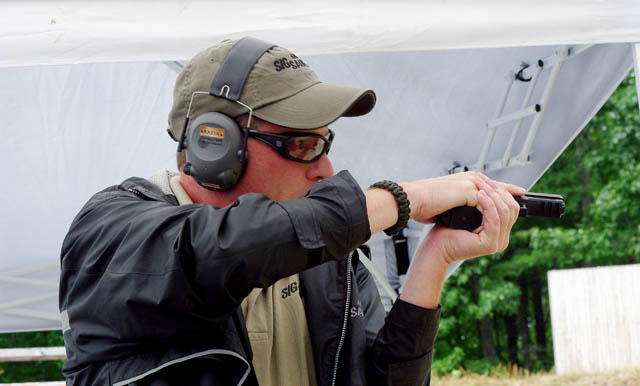
The first drill was simple. It starts with the shooter standing about 2 feet from the target. On the command, the shooter will move his weak or support hand into a block or strike position as he draws the pistol with his strong hand. The weak-hand position is chin high, to the side, elbow bent and tucked into the body.

This is counter to the training a lot of us have received, where we bring the weak hand to the center of the body to grasp the pistol for support. But, we are not going to use the weak hand for support when shooting. If you bring it to the center of the body, you have no power for a strike or a block. From the side position you can strike or block with authority. The strong hand draws the gun and fires two shots as fast as possible.
You should practice each of these drills multiple times until they become instinctive. Don't get into the rut of a double tap. Practice with two shots, then three or four, even five. One shot is never a good idea, due to the close proximity of the threat. You must take this terrorist out as fast as possible, and that means shooting until the threat is eliminated.
We practiced placing the elbow on the holster after drawing and before shooting. This helps to orient the shooting hand. Of course, it assumes a strong-side-carry belt holster. If you carry in another position, the elbow will tuck in on your side above where the holster would be. This position allows for instinctive shooting at close range and closes much of the distance to the target to help ensure center-mass shots. It also positions the hand to quickly transition to a high, two-hand hold, using the sights for a longer follow-up shot. The downside is it presents the pistol away from your body, where it is easier to grab.
Another drill uses the same technique, but places the forearm on the holster rather than the elbow. This keeps the gun closer to your body and presents a lot less for a bad guy to grab. It also opens some distance between you and the target, providing room to maneuver.
A third drill places the wrist of the shooting hand on the holster. This keeps the gun tight to your body and presents much less of it for a bad guy to grab. It is more secure for close-range work. In fact, we moved in until our toes were touching the target stand for this drill. We also practiced this and other drills with a buddy pushing our backs to simulate a wall, so we could not move backward.
The downside of the wrist-on-the-holster technique is the pistol's slide can catch on your clothing and jam. To counter this, turn the gun sideways with the slide away from your body and with the bottom of the magazine jammed into the side of your belly, just above the belt. While this modified "gangster" style of shooting might make your buddies laugh, it will also keep you in the fight in a very close shooting situation.

The High-Tuck position has the gun high and drawn back to your chest with the thumb of your shooting hand against your pectoral muscle. This keeps the gun back againstyou and out of reach for the bad guy, but also high for a fast transition to your line of sight if you need to move to a longer-range target.
Another technique we learned is a slight variation on Paul Castle's Center Axis Relock (C.A.R.) position. This is another high-gun technique. You draw the pistol, grabbing it with two hands and then tuck it in high on the center of your chest, pointing to your weak side. With Rassa's variation of this technique, you turn the magazine into your body so the handgun is parallel to the ground. At the same time you take a step back with your strong-side foot and turn your body so you are bladed to the target, weak-side closest, with both elbows stuck out the sides and tucked back like chicken wings. The gun is tucked in tight to your body; you have a two-hand hold and have half your body, including the support-side elbow, between you and the target. This gives you more options for keeping the bad guy off you while retaining your pistol.
Shooting is instinctive, but transitioning to a high position with the pistol in your line of sight for longer shots is also fast. We practiced transitioning to the high C.A.R. position with the gun in a two-hand hold, close to the body and in line with the eyes, as we side stepped to shoot and move.
The Third Eye technique is another two-hand, high-body instinctive-shooting technique for extreme-close-quarters fighting. While we have all trained with a two-hand hold with the gun extended, that presents a problem when in close quarters because the gun is out there for somebody to grab. So, collapse your arms and bring the gun back to your chest with your elbows out to the sides and your wrists against your chest.
Keep the gun tight to your chest and locked straight ahead and keep your eyes focused straight ahead. Any movement will be as a group. That way the pistol is pointed exactly where you are looking, just like a third eye. This is a very fast way to engage multiple close targets. It also helps keep the gun tucked in tight.
The downside is you may have brass flying into your face. Ignore it and do not allow it to distract you from shooting. Also, don't get the gun so close that the slide hits your chest, which could cause a stoppage.
Next, we repeated most of the drills, with a twist. We first used the support hand to strike the target. The idea is to buy a little time.
The strike could be to the head—with the nose,or ear as a target—or low, with what Akehurst calls the "Triple-T" (Tactical Testicle Tap). At the command we would strike, draw and shoot. Of course, you must get your hand out of the way before bullets arrive.
One big issue with close-quarters battle is when the bad guy has his hand on your gun. The problem with many of the techniques taught to remove it is they don't work or they leave you off balance and in a poor fighting position. The smart way out of this is to fight with a knife. Most of us carry a folding knife, and Akehurst was quick to point out the most-important reason is not to "cut a seat belt" as many will respond, but to keep our guns.
A show of hands proved most of us carry our knives in a strong-hand side pocket. It quickly became apparent how foolish this is when fighting for control of your gun with that hand. A few of the more-savvy students had their knives in the weak-side pocket. That's better, but if something has changed and you are using your weak hand to fight and need to access the knife with your strong hand, you are in trouble. Akehurst pointed out the smartest place to carry a folding knife is hidden behind your belt in the center of your body. That way, either hand can access it in a fight.
We ran through the same drills by drawing and opening the knife, stabbing the target and then drawing the gun and shooting—being careful to get the hand and knife out of the way before the bullets arrived.
In addition, we practiced drawing the knife and cutting the arm of the bad guy attempting to grab the pistol. The point of aim with the knife was the top of the bad guy's elbow to cut muscles and tendons so he lets go of your gun. To simulate the struggle, we used a string of large rubber bands fastened to the target and also attached to our gun hand. We practiced drawing and opening the knife, cutting the rubber band and freeing the strong hand to draw the pistol and engage the threat.
Next we worked with our backs to the target, to simulate the position when being patted down. The rubber bands were tied to the gun hand, which was on the pistol. At the signal, we drew and opened the knife with the weak hand, pivoted to the strong-hand side (clockwise for a right-handed person), cut the rubber band then drew the handgun and fired. From there, learned to transition to multiple targets.
Though you are unlikely to be a victim of a terrorist incident, being prepared could save your life if you're around when jihadists attack.


