I can still remember the first time I witnessed someone reloading their own ammo. It was a friend of mine with a small, single-stage Lee Precision press and barely enough room to operate it. He lived in a meager apartment with his wife and young child, but was somehow able to convert a small corner of the living room into a reloading area. It required all these different tools, machines, dies and things I wasn’t familiar with. He was throwing around terms like “case prep, primer seating, powder measure, tumbling and chamfering.” It was confusing and overwhelming. After more explanation and consequently more confusion, we finally started to load some shiny rounds of .223 Rem. He was able to accomplish this during the COVID quarantine, which precipitated one of the worst ammo crises in recent memory. To me, this was the most amazing and liberating part of the whole experience. During a time where all brick-and-mortar and online stores showed the dreaded “out of stock” signs for all ammunition and components, he was able to feed his rifle. That’s what made me realize I had to begin my own path to this fun, challenging, and self-preserving hobby.
Shooters handload for various reasons. Some do it to save a little money over buying factory made, and some simply enjoy the ability to manufacture their very own tailor-made rounds. But, the pandemic and ammo shortage made me realize the most important aspect: independence. If you’ve ever considered the prospect but felt intimidated, overwhelmed, or simply didn’t know where to start, this article is for you. I’ve been there. I finally achieved my handloading goal I set out to accomplish over 3 years ago. This past weekend I made 100 9mm rounds that functioned flawlessly out of my Glock G19, and what a glorious feeling it was. This will not be an in-depth explanation of how to manufacture ammunition, but more of an overview of the tools, equipment, components, and knowledge you will need to get started.
The first things you’ll need are a bit of space and somewhere to mount your press. If you want to go the best route and have the room to do it, get yourself a sturdy workbench with a wooden top. This will provide you with a platform to mount your press securely and enough space to work with all your various tools and equipment. If you’re tight on space, Lee Precision makes a reloading stand on which to mount your press and you can use other existing surfaces (table, counter, dresser) for your equipment and components while reloading. For the purposes of this article, we will be working off a bench.
Now let’s go through the main categories of equipment and list what you’ll need and what their purposes are. I’ll break these down into two main sections. “reloading equipment” and “case prep equipment.”
Case Prep Equipment
The equipment needed to prepare your dirty, spent cases for reloading.
Tumbler/Vibrator – If you are only planning on handloading small quantities of ammo, you may be able to get away with cleaning your cases by hand. It will take a little more time and effort, but will be the most cost-effective measure for small-scale handloading. Some small brushes and hot soapy water will do just fine for a handful of brass. There are endless resources online and elsewhere for learning how to clean spent brass.
The other options are using a wet-tumbler, or dry vibratory brass cleaner. The wet-tumbler from Frankford Arsenal is what I chose. Wet tumbling will produce the cleanest, shiniest brass if done correctly. This process usually includes the use of dish-soap or other type of solvent and hot water. The tumbler spins your brass around for a couple hours before you must drain and dry them thoroughly.
Dry-tumbling uses any type of several dry-medias as an abrasive to clean and buff your dirty cases. Corncob and walnut shell are the most widely used media for this task. Simply place your media, brass and a small amount of buffing compound in the vibrator and let it run for a couple hours. This method has been used successfully for decades and many seasoned handloaders swear by it. It is although, a fairly dusty, messy affair. You’ll also need space to store large amounts of your dry media, which is cheaper to buy in bulk. Wet-tumbling seems to be the more popular option currently. There’s nothing more rewarding than a big pile of clean, shiny brass that you cleaned yourself. If done correctly, your reloaded ammo can look just as perfect as any new factory ammo. Do some research, try some different techniques, and find the one that works best for you. That’s what matters most.
Case trimmer/chamfer tool – The vast majority of pistol rounds are much different than rifle rounds. Rifle calibers will usually have a “bottleneck,” while pistol calibers tend to be the same dimension from top to bottom. When prepping rifle brass, you will likely need to trim and chamfer your case mouths. The shoulder and neck of rifle calibers tend to stretch after firing and become too long to chamber, while pistol calibers hardly gain length at all. After trimming to the correct length, you must use a chamfering tool to remove any small burrs of brass from the case. You can find various trimmers and chamfer tool from many of the same manufacturers we’ve already mentioned.
Handloading Equipment
The tools you will need to prime, powder and seat your new bullets.
 The Press – There are a myriad different presses on the market today, even more than there were just three years ago. The main types haven’t really changed though: There are single-stage presses, turret presses, progressive presses and automated progressive presses. I went with a single-stage for its simplicity, so that’s what we will focus on. I chose a Forster Co-Ax press. Every press has different designs, features, and price points. Choose a press that best suits you from a reliable manufacturer (Hornady, Lee, RCBS, Lyman, Redding, Dillon are a few), and you’ll be just fine. Mount that press securely to your bench and consume all the content available to you regarding your specific press.
A Scale - In the digital age, one can find various digital scales for under $40 that might work perfectly well. Keep in mind though, you are weighing very precise measurements of gunpowder that will eventually be igniting a few inches from your face. I suggest spending a little more to get a digital scale from a reputable company such as Hornady. I chose the M2 Digital Bench Scale.
You can also go old-school but tried-and-true with a precision balance-beam scale. Again, I chose the one Hornady makes and it’s so fun to use. Dropping those tiny grains of powder in your pan and seeing that needle line up perfectly with your chosen weight is simply rewarding. I found myself using the balance-beam more than my digital scale for my first batch of 9mm. It’s extremely precise and surprisingly quick once you get a rhythm going. Make sure you have a level surface and calibrate your scale before each use.
Dies – In short, the die is the tool which allows you to perform all the functions necessary to reload a previously fired round. The die fits in your press and different dies perform various functions. These functions include: “de-capping,” which is punching out the old, spent primer; re-sizing the brass case and seating the actual bullet or projectile. Again, several reputable manufacturers of reloading equipment make dies. Just be sure to get the correct-caliber die for the rounds you will be handloading. I went with the Hornady Custom 9mm die set. The Hornady dies are relatively inexpensive and extremely well-made. If taken care of, they should last a lifetime. Manufacturers often have video tutorials on YouTube while also including detailed instructions in the die packaging itself. Follow your specific manufacturer's instructions.
One of the most tedious parts of handloading is getting your dies set up correctly. This will take some research. Online videos helped me immensely, as did trial-and-error. Again, read your manufacturer’s instructions thoroughly. Don’t get frustrated when you mess up a case. Learn from your mistakes, discard them, and move on.
Primer Seating Tool – There are a few different ways to go about seating your new primer once the old one has been punched out by your de-capping die. There are relatively inexpensive tools available called “hand-priming tools” and this is what I chose for my particular set-up. It’s a small handheld device which holds your empty case in place and seats a primer in the empty primer pocket with a simple clench of your hand. Again, this is a quick and inexpensive way of priming your brass and has the added benefit of more hands-on time with your spent cases for visual inspection. Splits or cracks in cases are dangerous and those cases should be discarded immediately.
The other option is priming on your press itself. Many presses are fitted with a contraption which allows you to seat your primer with a push of your press's lever. These contraptions can be somewhat cumbersome and many require picking up each single tiny primer and feeding it in by hand. The hand-priming tool however, will hold up to 100 primers and in my opinion is an easier and more automated process.
Powder Measure/Dispenser – This one is not necessary but can be an immense time-saver when reloading en masse. This device measures an amount of powder by volume in very small adjustable increments. By simply turning the threaded “meter” in or out, it will dispense a precise amount of powder within a couple tenths of a grain with a throw of a lever. Once you get set-up and calibrated, adding powder to 100 cases of brass can take as little as 10 minutes. If you are a high-volume shooter/reloader, you’ll want to get one of these. Certain types of powders work better than others in a powder dispenser, always check your weights.
Aside from some smaller tools you’ll need like a funnel, a set of wrenches, a tray to hold your cases, a notebook, flashlight, these are the main tools and equipment you’ll need to get started. On to the components. Digital Calipers are also an important tool for measuring the overall and case lengths of your rounds.
Handloading Components
The individual parts which make up your rounds of ammunition. Always try to buy your primers and powder locally. If you order these online, you will be subject to a “Hazmat shipping Fee” anywhere between $25 to $35 (or more).
Brass – If you think you may reload in the future, start saving your brass now. I’ve been saving my brass for about two years, and when I finally got set up with my press, I had plenty of brass with which to begin handloading. It might even be a good idea to invest in your tumbler before everything else. Storing clean, sorted brass is a bit less hazardous and will give you a good, organized head start when you actually begin handloading. Again, anything with cracks, tears or damaged rims should be discarded. Only save brass in good shape. Minor case denting will be worked out in the re-sizing process.
Primers – Begin doing research on the calibers you wish to handload and start stocking up on the respective primers for those calibers. In a shortage, primers are the first component to seemingly vanish. Slowly start purchasing primers anytime you come across the right type. Typically, the top 3 brands are CCI, Winchester and Federal. The main types are small and large rifle or pistol, and magnum rifle or pistol. Primers are what ignite your round. You’re expending all this time and effort to make your own ammo, don’t cheap out on your components.
Powder – Choosing a powder is probably the most perplexing part of reloading. There are vast types of powders with ambiguous number designations such as N133, H4350, 2230. Names like, Varget, Longshot, Silhouette, or TAC don’t help much either. The bottles in which they are packaged usually don’t describe the calibers they’re designed for either! Your best bet is to get a manual or two and start doing research now. You’ll likely need to buy a few different types of powders at first and see what you and your firearms like best. Just be absolutely sure you are using the correct amounts of the correct powders for the correct caliber you are loading. Powders have drastically different burn characteristics and mixing up a pistol powder in a rifle cartridge or rifle powder in a pistol cartridge can lead to disastrous and often dangerous results. Don’t let this intimidate you though. There’s always a right powder and load. Just do your research and always double check with multiple reliable sources.
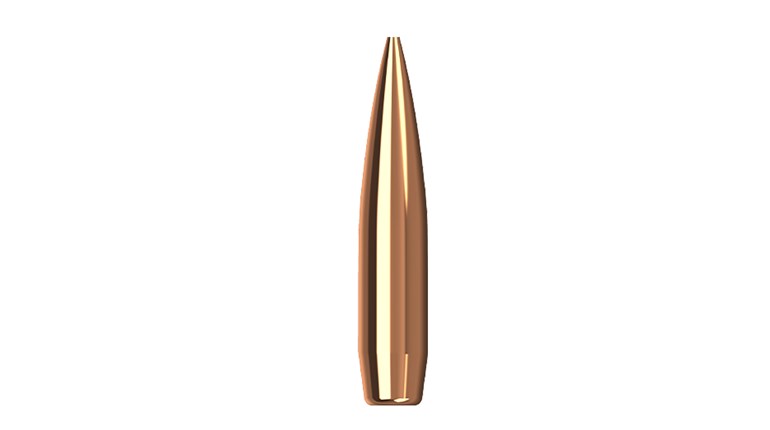
Bullets/Projectiles – We won’t get into the weeds about melting lead and casting your own projectiles, although it can be done and many handloaders do it. The vast majority of the time, I go with the crimson red box with the hologram sticker, Hornady. Hornady makes some of the best, most consistent and cost-conscious projectiles in the business. You can almost always find a bullet to fit your individual needs from Hornady, from rifle to pistol, hunting to match, plinking and anything in-between. There are many other brands and types and everyone loves their own. You can also always count on most handloading data publications having plenty of loads developed and tested using Hornady’s bullets. They are known, trusted, and ubiquitous for a reason. Make certain you are choosing the correct caliber designations and grain weights for your firearm. Investing the $20 to $30 for a cartridge gauge for each specific caliber is also a good idea. It’s a simple piece of steel that is SAAMI spec for a specific caliber. Just drop your finished round in the hole and if it fits, you’re good to go. If not, you need to re-evaluate and figure out where you went wrong. Better to do that on your bench than in your firearm at the range.
 Some other notable tips I’ve learned from my initial set-up:
Turn any fans off and keep any other electronic devices away from your precision digital scales when weighing powder. A slight breeze can throw off your weight significantly, while electrical currents from cellphones or other devices may do the same.
Focus on the task at hand. It can be easy to get distracted with phone calls, conversations or television when handloading. This can put you at risk of making simple mistakes that could be dangerous. Always pay close attention to what you are doing and double-check your work.
Be careful not to contaminate your powder or primers with oils from your hands, food, drink, or anything else that could potentially cross-contaminate your components. Wash your hands frequently, especially if you take a break from loading cartridges.
Get a couple of good funnels and trays for holding your brass. Different manufacturers' funnels have different designs and shapes and you won’t know which one works best for you until you try a couple. Trays to hold and keep your brass organized while reloading are also invaluable. These two accessories are usually relatively cheap to buy.
Compressed air is a great tool for cleaning your dies, presses and any other sensitive and hard to reach areas. I just use keyboard duster for my small set-up and it works great.
Find yourself a good lubricant. Whether you need to lube your dies, brass cases or tools, this will come in handy. I got the Hornady “One Shot” which produces an incredibly thin, almost dry-lube coating. I like it and I think I’ll be sticking with it for the time-being.
Recording all your load data. Get a reloading notebook or pad and write down your loads. Record your data at the range and save all your information. This will help immensely when you want to re-create a load, or if something weird happens. Having all your steps and load data recorded is very important.


