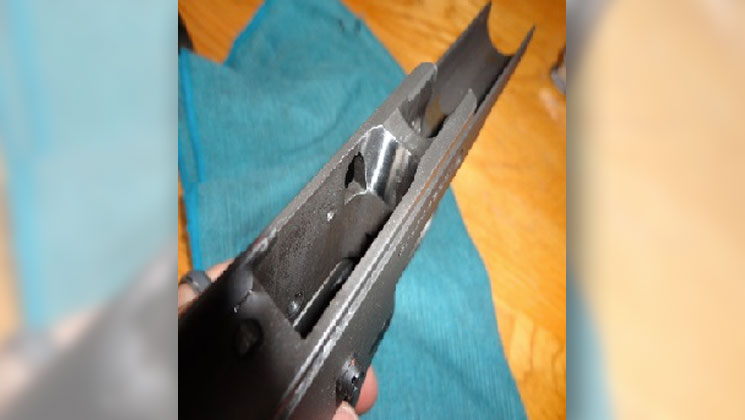
Back in the early days of IPSC competition, polishing the feed ramp of a 1911 it was common practice. Many competitors thought they also needed to change the geometry of the ramp to eliminate the small gap that was between the top of the feedramp and the throat of the barrel. Many found out the hard way that they were wrong. Retaining that gap is vital to the pistol reliably feeding rounds. While the world “ramp” conjures images of as a bullet nose being stripped from a magazine and sliding upward toward the chamber mouth, in actuality; according to Kuleck and Oldham, “…it bounces off the ramp, then off the barrel hood, then into the chamber.”
Polishing a feedramp is a judicious exercise in minimalism. It should only be attempted if your pistol won't successfully cycle dummy rounds. The goal is twofold: to gently remove the tool marks from the feedramp—without removing any metal—and more importantly with no change to angle or contour feedramp. Also of importance, there's a small "step" or juncture (roughly .032-inch) between the top of the ramp and the barrel throat, which must remain intact and unchanged. Any modification to the feedramp angle or that step with buy you a one-way ticket to malfunction junction.
I’ve seen more than one DIY 1911 DVD where professional gunsmiths suggest a light touch and a Dremel or a similar tool with a Cratex tip is all that’s needed. I think not. The authors put it best when they wrote, “Frames are expensive, and an FFL hassle.” So, unless you have extra $500 laying around, go right ahead.

Otherwise, using a half-round file (one that roughly fits the feedramp concavity). My contact at Caspian suggests a magic marker of the same size. Wrap some fine-grit sandpaper around it and gently sand until the majority of the tool marks are gone. In my opinion, you don’t have to remove them all. After all, they’re like Doritos. Shooting your pistol will merely make more. Smoothing the area merely makes it easier for the cartridge to move up into the chamber.

Sand lightly for a few passes, taking care not to alter the feedramp’s angle or contour. Then reassemble the pistol and repeat each of the tests with the dummy rounds. When they feed flawlessly through east test, your pistol’s finally ready for the range.
Congratulations, you pistol is complete. The next entry will discuss a simple live-fire function test designed to confirm everything is running smoothly.