So, you’ve got a pile of AR-15 components lying around that you’ve been squirreling away for a rainy day, and you’ve decided there’s no time like the present to put everything together. Last year we built an AR-15-based rifle, and decided that a carbine version would be a natural complement.
We put together an excellent series on the various functional groups of the AR-15 and how they are assembled. Bob Boyd has done yeoman’s work detailing the parts, tools and assembly of the AR-15: How to Build an AR-15.
Now, at this point I’ve built a fair number of lowers and can identify the parts on sight. I’ve even managed to put a couple lowers together without outside assistance, but the Brownell’s video series is great for beginners or just as reassurance. It—and many other excellent resources—are only a click of the mouse away if you get to a point where you’re uncertain how to proceed.
When it comes to building an AR-15 carbine, financially it doesn’t make sense to build a “stock” configuration. Smith & Wesson, Palmetto State Armory and others make perfectly functional rifles right out of the box for little more than the parts at retail. Where savings can be achieved is in building a “next-level” carbine with upgraded parts—and you can also pick and choose components rather than select from pre-made options. There are certain parts, like the bolt catch and trigger guard, that are easier to install fresh rather than replacing existing items. Picking out exactly what you want is the true appeal of building your own rifle.
For this build, utility and weight-savings were important in the set-up, and items were chosen with that aim in mind. It’s not a super-light build like we’ve featured before, but keeping weight down is always a plus.
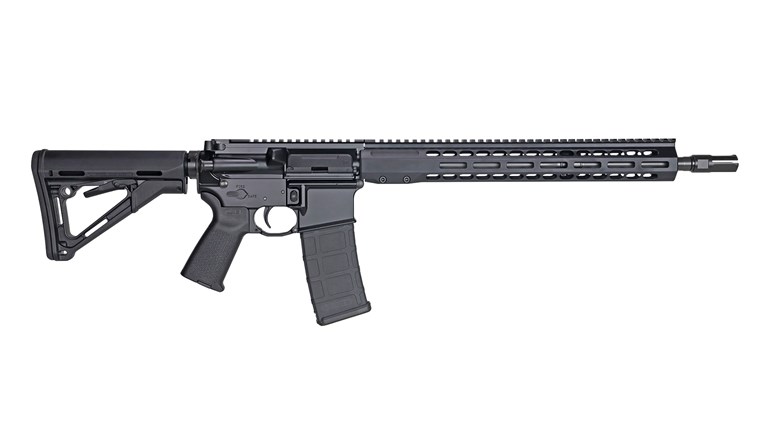
For the lower receiver, an Anderson Rifles stripped lower receiver served as the blank canvas upon which our carbine would be created. Palmetto State Armory provided the buffer, spring and tube as well as a lower parts kit. Upgraded components came from Xtreme Precision in the form of stainless détentes and pins, while Seekins Precision parts were chosen for the magazine release, bolt catch, trigger guard and ambidextrous safety selector. Timney Triggers’ new Targa 2-Stage Long trigger offered a drop-in upgrade to the standard milspec trigger and provides a competition-ready, two-stage trigger for more-precise work. Mission First Tactical’s Minimalist buttstock—one of the lightest stocks out there—and its Engage pistol grip round out the lower receiver. The total MSRP of the complete lower receiver was $564.
Putting together an AR-15 lower receiver is not terribly difficult—believe me, if I can do it, anyone can do it. One area where I struggle is the installation of the bolt catch: I always seem to scratch the receiver a little trying to work the pin into place. A helpful suggestion offered by an experienced friend is to use a layer or two of painter’s tape over the receiver while driving in the roll pin.

Ever since hearing that Brownells was getting into the AR-15 game, I’ve wanted to include one of the company’s receivers. A flattop version is now available, and it was finished with an Xtreme Precision upper parts kit. A CMMG mid-length gas tube, Mission First Tactical low-profile gas block and Brownells’ 16-inch, mid-length gas system BTAC barrel with a 1:7-inch twist rate finishes the hardware portion of the upper. CMMG’s RKM9 KeyMod handguard allows a multitude of attachment options, one of which is the Mission First Tactical REACT vertical fore-grip. Charging the carbine is easy thanks to a Bravo Company Gunfighter Ambidextrous charging handle, which retracts a Faxon Firearms GUNNER lightweight bolt-carrier group. The barrel is capped with an Xtreme Precision Zombie Thumper muzzle brake (couldn’t resist the name), while Yankee Hill Machine’s flip-up iron sights offer backup to the SIG Sauer Romeo5 red-dot optic. Total upper cost: $1,015.
Putting together the upper receiver really was anti-climactic. The hardest part was finding the manual dexterity to complete the lower receiver and drive in roll pins without marring anything; installing the CMMG RKM9 handguard was literally as simple as turning a (torque) wrench. Fit the barrel to the receiver, torque down the barrel nut, install the gas tube, tighten the gas block, torque the muzzle device, then get the handguard in place—that’s everything needed to put together an upper receiver short of putting in the bolt carrier group and charging handle.
A few points from the build: Having the right tools is absolutely critical. For example, roll pins are the bane of my existence. Getting the pin aligned with the hole, then lining up the punch and the hammer is really trying the limits of my patience and dexterity. Having a roll pin starter punch would significantly improve the process. In that same vein, don’t be shy about asking for assistance—I assisted a co-worker with a lower build, and the two of us worked together to get the bolt-catch in place on his lower. Not a single mark on the lower with the two of us working together (I held the pin and punch while he drove it into the receiver). Lastly, test-fit *everything* before assembly. Little things like working the pistol grip into place before you have the safety selector detent spring precariously perched mean the difference between a smooth installation and one fraught with pinched fingers, expletive deleteds and bent springs.
When all is said and done, the carbine comes in at slightly more than $1,500 complete. For a mid-length gas system with freefloat handguard, custom trigger and upgraded components, it’s in the same ballpark, price-wise, as offerings from Daniel Defense, Colt, CMMG and others. Interestingly, I put the carbine on the scale and was quite surprised to find that it weighed in at a svelte 5 pounds, 13 ounces. While I was taking steps to save weight, this was by no means a lightweight build. It does drive home one of the best things about building your own carbine: you can include the exact components you want without having to switch things out later. Not to mention the satisfaction of building it yourself.


